
Buttons Setup
Understand the basics of working with Web Apps editor and build your application that will consist only of buttons.
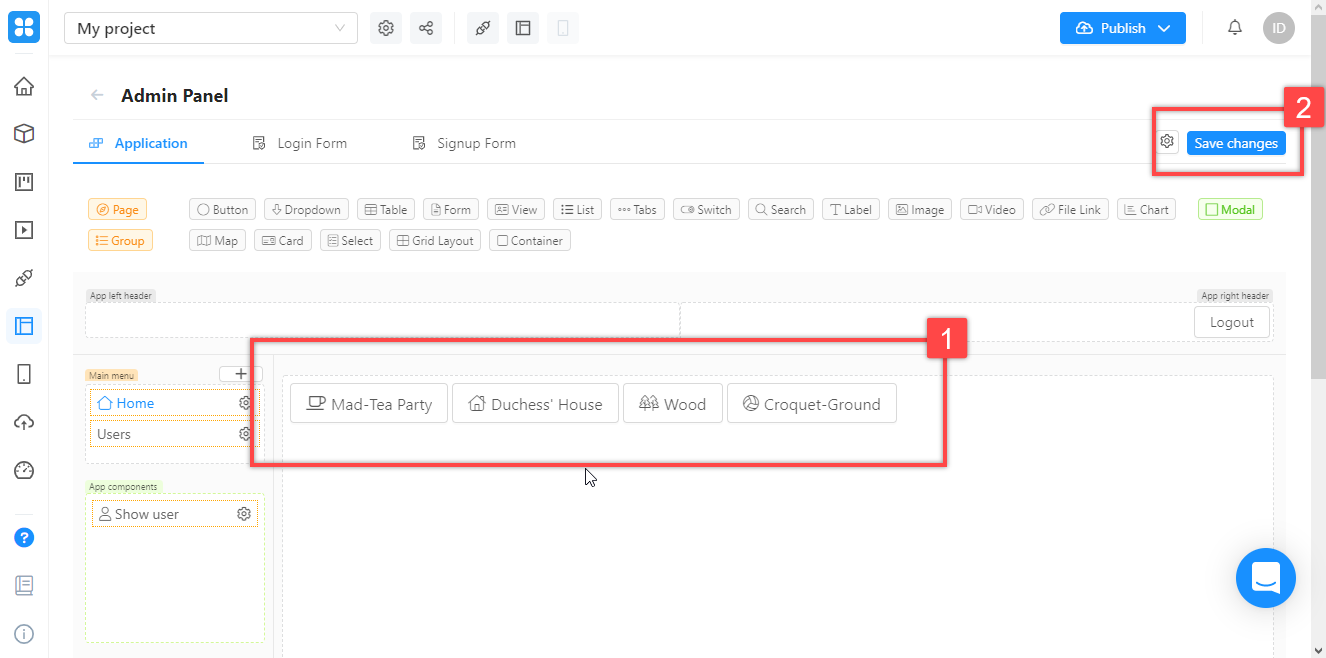
Let's make a short quiz based on the book Alice's Adventures in Wonderland. Let's find out if users remember where Alice first meets the Cheshire Cat.
Our application will have:
Question text: Where did Alice first meet the Cheshire Cat?
Choice buttons: Mad-Tea Party, Duchess' House, Wood, Croquet-Ground. If the user chose the wrong answer - the button with it disappears, if the user chose the correct one - all buttons with the wrong answers disappear at once.
Pop-up messages that tell you whether the answer was correct or not.
How to create a button
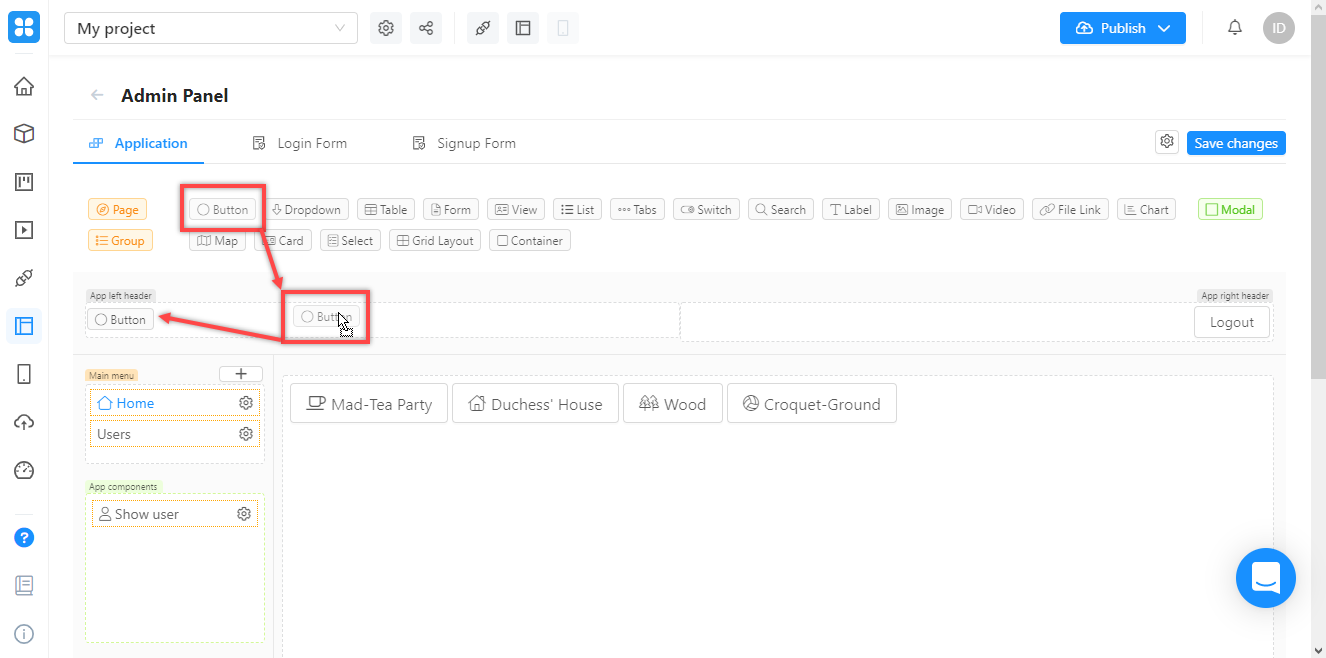
Drag the "Button" element with the mouse pointer (by clicking and holding the left key) to the area where you want to place the button.

You need to add four buttons - according to the number of possible answers.

Customizing button appearance
Click on the first button once — the settings window will open up. You will find yourself on the "Look&Feel" tab, which is responsible for the appearance of the buttons.
1.Edit the following fields:
Label: button text - enter the first answer: "Mad-Tea Party";
Icon: button icon - click on the "Pick icon" and choose the one you like (now there are more than 2500 of them);
Size: button size - set to “Large” to make the button large;
Name: This is the name by which the button is "seen" by other elements in your application; each button needs a unique name - name the button "btn-mad_tea".
When you edit the fields, the image at the top of the window will change to show how the button will look after the settings have been applied.
2.When you fill in all the fields - click "Save".

Configure the rest of the buttons by analogy with the first, using the names: btn-duchess_h, btn-wood, btn-croquet_g.
Click "Save changes" to save changes to your application - otherwise, the buttons will disappear once you refresh the page or close the editor.
Setting up triggers and events
Now you need to set the actions of the buttons. Let's start with the one with the correct answer - "Duchess' House". Your task is to "explain" to the Web Apps editor:
what is the trigger of the button - means, what exactly it should react to: on pressing;
what event occurs in this case: the buttons disappear;
where this event happens, what elements changes: other buttons.
Go back to the “Duchess' House” button settings and go to the Triggers tab. All triggers that have been added for it will be displayed:
Now there is only one - "OnClick". It is added automatically and means that the button will act when you click on it (which is exactly what you need).
In addition to "OnClick", other triggers are possible for the button. A complete list with a description is in the platform documentation.

Now you need to specify information about the event (you will have three of them - one for each button). Click the "+" next to "OnClick". The event settings window will open.

In the "Target component" field, you need to indicate where the event will occur, in the "Action" field - what kind of event it will be.
Hide all wrong answers
Add an event that will hide the Mad-Tea Party button:
Click on the "Target component" field and find it by the unique name btn-mad_tea. In the Action field, select the appropriate event, in this case - “Hide Button”.
Click “Save”.

Configure the rest of the buttons to be hidden in the same way.
This is how the list of triggers for the “Duchess' House” button should look like when you're done.
Click “Save” to save your changes.

Now you need to make sure everything works.
Save your changes.
Press the button for publishing the application (placing it on the Internet), select "Development".
Click on the go to your app icon - it will open in a new tab.

Go to the app and make sure that when you select the correct option, the rest of the buttons disappear.

Hide incorrect answers on click
Now let's make the button with the wrong answer "Mad-Tea Party" disappear when the user clicks on it. In this case, both the trigger (pressing) and the event (disappearing) belong to the same button - you only need to work with it.
Open the button settings, go to the “Triggers” tab, add a new event to the “onClick” trigger. In the “Target component” field, select “This component (self)” to indicate that the button activates an event for itself. The value of the "Action" field is the same as in the previous example - "Hide Button". Save all changes and publish the app, switch to the app tab, and refresh it. Check that everything works as intended:

Now adjust the "Wood" and "Croquet-Ground". Save, publish and test it again.

Types of buttons
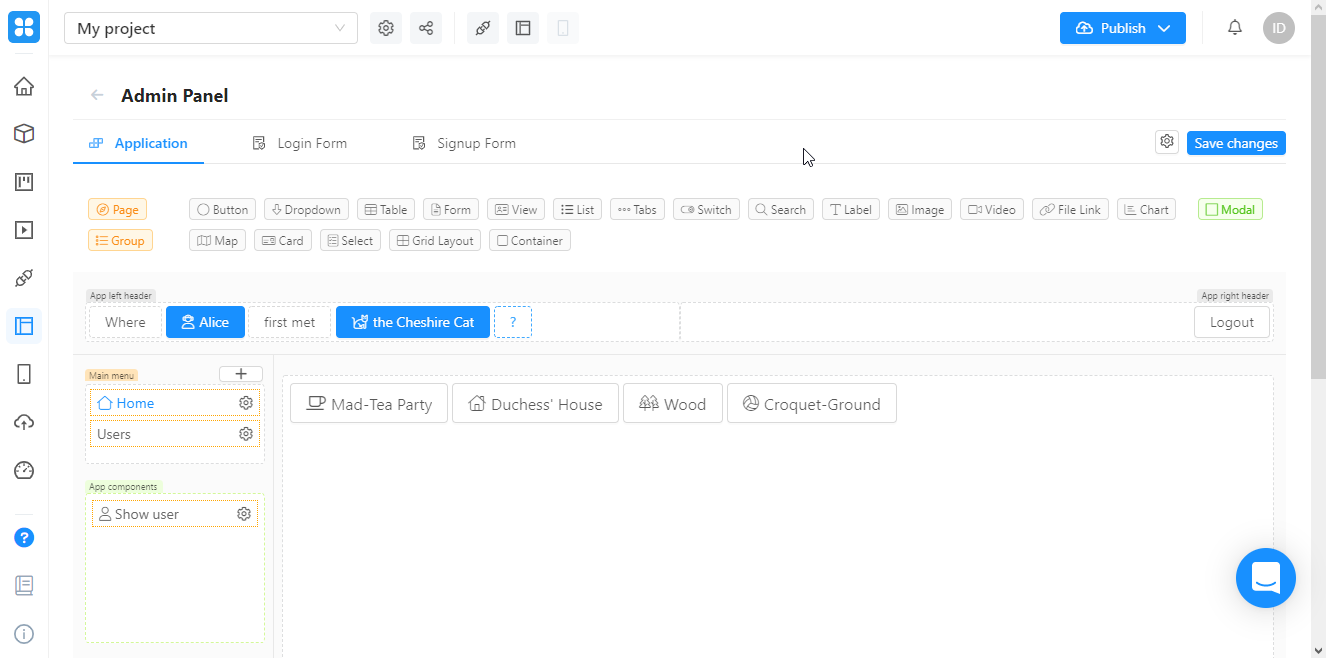
Great, the answers work. It's time to add a question. Of course, Appmaster.io has special elements for this, but you remember our task - buttons and nothing else. So let's add one more. This time - not to the main canvas, but the top of the page: To make it more fun, fill out the question as on this screenshot:
To make it more fun, fill out the question as on this screenshot:

Now "colorize" using color schemes for different types of buttons: go to the settings and switch the value in the "Type" field to any other.

We got it like this, but you can choose your option, the color scheme of the button does not affect its operation:
Now let's move on to the last task - setting up a message for the user.
More difficult task
You can display a message on the screen in different ways. We've picked one of the most unusual ones:
- First, let's make sure that the buttons containing the question are automatically deactivated when the user has given the correct answer. They will turn gray and stop responding to clicks. To do this, we use the Enable (Disable) function, which we have not yet considered, and the already familiar "onClick". - Then we will consider a new trigger - onStateChange, which is triggered when the state of the button changes. Let's assign this trigger to the "?" - and the message will be displayed on it.
Deactivating buttons
You can enable or disable the button manually in its settings by toggling the "Enable" field selector:

To set up automatic switching, open the “Duchess' House” button preferences and add an “onClick” trigger. In the field "Target component" select one of the question buttons, in the fields "Action" - "Disable Button". Repeat for all buttons that contain a question. It should look like this:

Remember to save all changes, publish and check if the application is working correctly.

Now, let's bind the start of the message to the button "?" (we named it "btn_qqq"). Let's add the trigger "onStateChange" to it. It activates when the state of the button changes - for example, when it turns off.
In the “Target component” field, select “Application” (the message will pop up in the application window), in the “Action” field - “Show UI Message” (show a message to the user).
In the "Message style" field, choose the one that best suits your situation. In our case, this is "Sucess" - a message about successful completion.
Fill in the "Title" and "Content" fields - inform the user that the answer is correct or just write something nice.

Save, publish and test.
Result
Choosing the correct option, buttons with incorrect answers should be hidden, the text of the question should fade and a confirmation message should pop up.


Of course, it was possible to customize the message more easily by binding it to the correct answer button. Although today we are not looking for easy ways. Moreover, you already know enough to do this without our instructions. Try to customize the error message that will pop up when you choose the wrong answer. It should look like this:


We are sure that this instruction helped you to get to know Appmaster.io better. But if it was not clear (or maybe, on the contrary, too simple), write to the telegram channel of our technical support about instructions you need. We will write them!
Last updated
Was this helpful?